
|
Downloads
Wiki
Build CodeLite
Devs
|
Main /
SFTPOn this page... (hide) IntroductionWith the release of codelite 5.3 a new plugin was introduced: the SFTP plugin. This plugin hooks into codelite 2 new tabs as seen in the screenshots below: One tab is placed in the workspace view, the other in the output view: 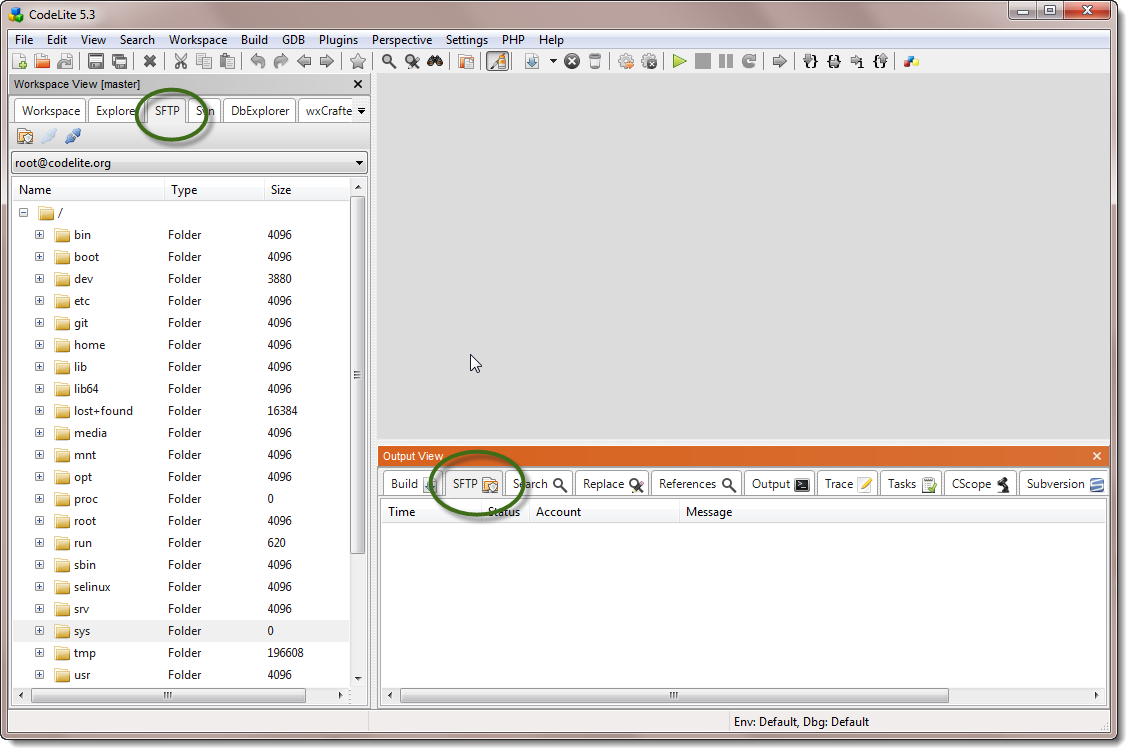 With this new plugin, one can accomplish the following:
Another functionality that was introduced with this plugin is Workspace Mirroring. File Browsing with SFTPIn order to get started with the SFTP plugin you need to setup an SSH account. To do this, you can either click on the Open Account Manager button in the SFTP toolbar at the top of the SFTP tab (in the workspace view) or from the main menu: Plugins -> SFTP -> Open SSH Account Manager (see following screenshot) 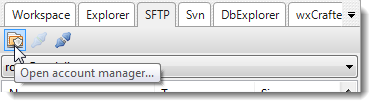 Once clicked, the "SSH Account Manager" dialog is displayed To add a new account:
Note that the Password field is optional. If not provided, the SFTP plugin will try to connect either using SSH keys (the one that is stored under ~/.ssh folder) or via anonymous login. 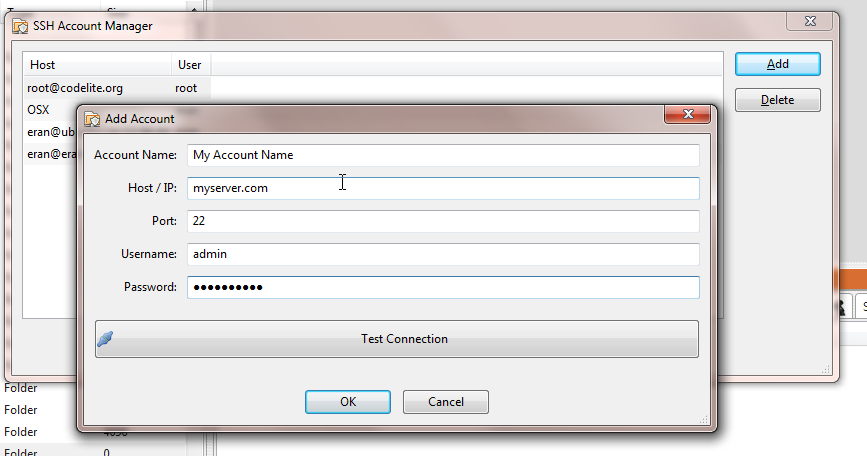 You can try out your new account connection with the Test Connection button. When everything is OK, click OK and dismiss the dialog. Now that we have setup an account, it should appear in the drop-down list in the SFTP explorer tab. To start browsing your files:
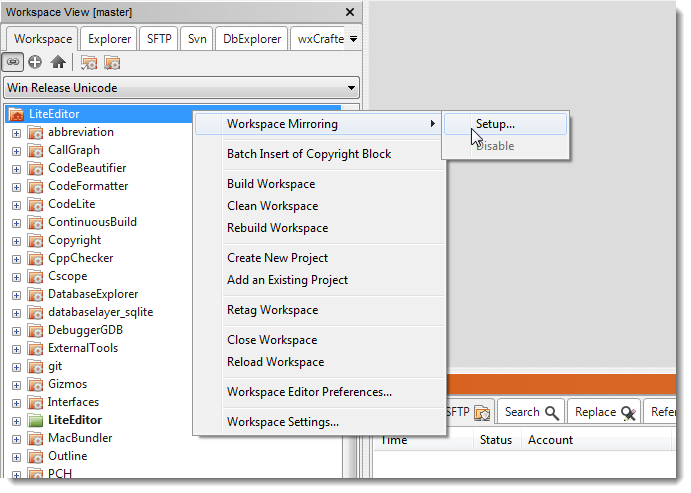
Once connected you can start browsing your files on the remote server (open, edit save etc). The SFTP sets an internal timeout for connect of 5 seconds. Workspace MirroringWorkspace mirroring is a way to upload your changes from your local machine into a remote machine in the background. So basically every change you make on your local machine is uploaded into the mirrored workspace. It is especially useful in cases where you want to test code that was compiled and tested successfully on your local machine, on a second machine which runs a different OS without first committing your changes to the source control (git, svn etc). How does it work?Prerequisites
You only need CodeLite on your local machine to make it work Setup

 |